As you enter into this blog, you will find all sorts of DIY's from home décor to papercrafting...all created by me...a sweet & sassy woman, saved by Grace. I am always challenging my world of handmade possibilities & I am always seeking the crafty life! I hope you find lots of inspiration here!
I was gifted this small cabinet door from a friend. She was getting rid of this small cabinet and thought I would like one of the doors to it because of the decorative wire heart in the center...and she was right!! She even left the hinge on it! Measuring in at 7 inches in length and 8 1/2 inches tall, it had just the right amount of real estate to make into a shabby chic piece of room décor. I didn't even have to do anything to the door itself, because it was already distressed. I wanted to add a little bit of an industrial look to this project by adding gears and a vintage door knob backplate, which is just the perfect shade of rust! Adding in all the exquisite pieces from Reneabouquets including a newly released Printed Beautiful Board fairy, called the Sweet Garden Butterfly Fairy with Glass Wings (which is the centerpiece of this project), this shabby chic piece of art turned out fabulous! Below you will find the pictures showing close up detail of the project , followed by a link to my You Tube video, showing the entire process of this project in a start to finish format, and completing this blog post is a list with all the links to the Reneabouquets product that I used on this cabinet door! Thanks for stopping by!!
I wanted to create a home décor piece using some new Beautiful Board pieces from Reneabouquets, featuring some Steampunk Style elements and a Beautiful Printed Board image piece that I fell in love with...Tessie B Darling...part of the Garden Party collection. I started with a home décor piece from Dollar Tree and by repurposing it, adding beautiful Blue Fern Studio papers, some mixed media elements and exquisite product from Reneabouquets, this turned into a unique piece of Home Decor! I wanted to add in an eclectic centerpiece, so the light bulb became part of the decor, and of course, I added in some Reneabouquet flowers, some quotes and all these pieces combined into a shabby steampunk piece that I think is unique, pretty and inspirational! You might want to take a peek at all the Beautiful Board Garden Party elements and Beautiful Board the Steampunk Style elements at Reneabouquets...it's time to craft!! You won't be disappointed!
I will have all the links below to the product I used on this project from Reneabouquets, as well as the start to finish You Tube video on the project! You can see it all come to life in fast forward detail!
Thanks for stopping by!!
You Tube Video:
Reneabouquets (RB) product links used in the project:
I wanted to create a beautiful gift for a friend and was able to find a premade farmhouse type home décor piece from WalMart. I loved that it had a see through chicken wire center, but knew that the wooden cow wired to it, needed to be removed. LOL. I'll save that for a later project! The original color was a very, very, very bright blue, so I primed it first with some white chalk spray paint and then used Prima Heavy White Gesso and a round pounce brush to add texture on top. I did several layers of pouncing the gesso onto the frame and then heat set it in between the layers. It gives such a wonderful, all-over, finite texture. I wanted to give the project a timeless, shabby chic, inspirational feel, and still add some steampunk type elements from Renabouquets new Beautiful Board line called "Steampunk Style". The gears look right at home amidst flowers, glitter glass, printed Beautiful Board, butterflies, lace, Blue Fern Studios new paper line called Tattered Walls and so much more from Reneabouquets.com and Reneabouquets Etsy. It all came together to complete an overall enchanting, textured quality for a treasured keepsake that can be displayed for years to come.
Below the pictures will be a link to my YouTube video for a complete start to finish process of how I made this project! I will also add the links to the products used in this project from Reneabouquets.com.
You Tube Video:
Reneabouquets (RB) Product Links used in this project:
I wanted to create a gift for a friend who is having a few medical issues right now, in hopes, that it would be inspirational for her and make her smile! I started with a 2 pc. layered butterfly that I found at Dollar Tree and by adding beautiful papers, some mixed media elements and exquisite product from Reneabouquets, this turned into a sweet piece of Home Decor! For the main focus of this project, I wanted to feature one of Reneabouquets Printed Beautiful Board pieces from the Garden party collection...Junie B Darling....and she is definitely darling!! You might want to take a peek at all the Garden Party elements at Reneabouquets...it's time to craft "spring and summer"!! You won't be disappointed!
I will have all the links below to the product I used on this project from Reneabouquets, as well as the start to finish You Tube video on the project! You can see it all come to life in fast forward detail!
Thanks for stopping by!!
You Tube Video Link:
Links to Reneabouquets (RB) products used in this project:
Although I already have a wonderful spinning Tool Caddy, it is large and sits under my crafting table, so I wanted to create a small caddy for the tools that I seem to grab most often with every project! I wanted it to represent my style... being shabby, eclectic, using some of my favorite colors and make a statement about how I feel about crafting, in general. I also wanted to be able to repurpose a couple of boxes I had lying around. I knew that once I "adjusted" the boxes, there would be ample room to house supplies. I originally found these boxes at Dollar Tree and had 2 different sizes on hand. I also had a galvanized metal envelope that was given to me and I thought it would be a cute accent to hold even more additional supplies. Of course, this project would not have turned out the way I was envisioning it, if it weren't for all the different Reneabouquets supplies that I was fortunate to use! I will list all the Reneabouquets supplies used in this project below, with their links and a link to my full You Tube video that shows the complete process of this project in a start to finish format! Thanks for stopping by!
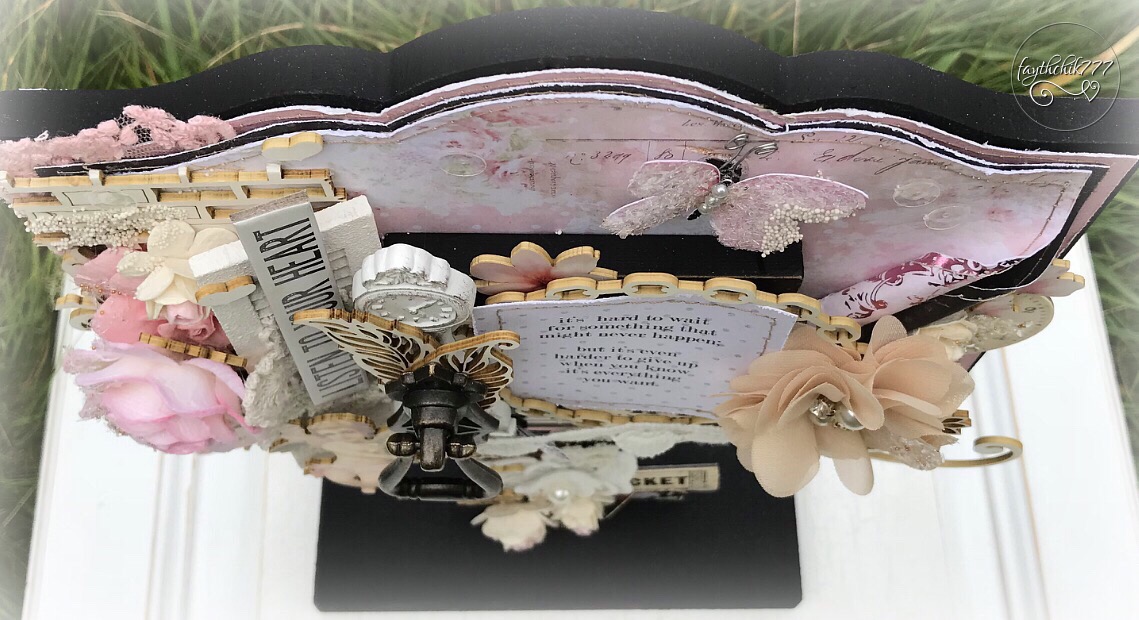
I had found this great shaped pedestal frame at Hobby Lobby, on sale with a price of about $6. I loved the scalloped edge at the top and it had enough landscape to add some beautiful Reneabouquets product and turn it into a home décor masterpiece! My thought was to have an inspirational quote as the centerpiece to my design and I think I was able to find something that would do! LOL. So, this piece originally had another wood element glued on top, and I was able to pry that off and then I painted the piece (front and back) with Prima Heavy Black Gesso, using a pounce brush and heat setting into between coats to get a subtle, yet great texture. After this was complete, I traced the main shape onto a few pieces of coordinating colors of paper and cardstock. Each piece of paper was about 1/8 inch smaller than the prior sheet so that all my colors peeked through. On two sheets, that were going to be my top sheets, I cut a horizontal slit about 3 inches deep on the right side. Then I used a sewing machine stitch around the perimeter of all my papers and even guided that stitch around where I cut horizontally into the paper. After the sewing was complete, I distressed the edges with my Prima distress tool. Now, going back to the two sheets I cut the slit into...I wet that part of the paper with water from a spray bottle, curled the edges inward with a paintbrush handle and then used a heat tool to set the curl. I thought this would give some great looking, fancy, texture!
OK...so this gives you a background into the start of the project...from there, tons of Reneabouquets product, as well as some from my own stash, were layered and set into place and.....the pièce de résistance is complete! Here are the pictures...followed by the You Tube video which shows the entire process, and then the links to all the fabulous Reneabouquets products that were used in the project! Thanks for stopping by! Enjoy!!
The minute I saw new product line from Reneabouquets called “April in Paris”, the Beautiful Board and Printed Beautiful Board collection, I had to create a project featuring at least two of the 1800’s vintage ladies, Elisabeth and Gabrielle...both stunningly elegant in detail. I wanted to feature them in a moment of time, capturing, perhaps, a qlimpse of their statuesque beauty and hoping to portray that feeling of another era. This is why I thought it would be great to place the scene in a birdcage...it’s captured in an enclosed space, and allows your mind to take a glimpse into the 1800’s, making it feel more up close and personal...at least this is what I wanted to portray with this particular project. I will have all the Reneabouquets product links below that were used in the project as well as the start to finish You Tube video so that you can see the entire process of this piece. Thanks for stopping by!